How to Remove Wallpaper Without Damaging Drywall
Removing old wallpaper is one of the most-Googled home tasks — and the one most likely to wreck the wall underneath. Here is the safe method, step by step.
If a previous owner papered the bedroom in 1987 floral and you’re finally about to do something about it, take a breath before you start scraping. Removing wallpaper the wrong way can tear up the drywall paper underneath, leaving you with hours of patching, sanding, and skim-coating. With the right approach — patience, hot water, and the right tools — you can remove wallpaper without damaging drywall and have a paint-ready surface in an afternoon.
What You’ll Need
- A plastic drop cloth (essential — this gets wet)
- A scoring tool (a “PaperTiger” or similar — about $7)
- A garden sprayer or large spray bottle
- Hot water and either fabric softener or wallpaper stripper concentrate
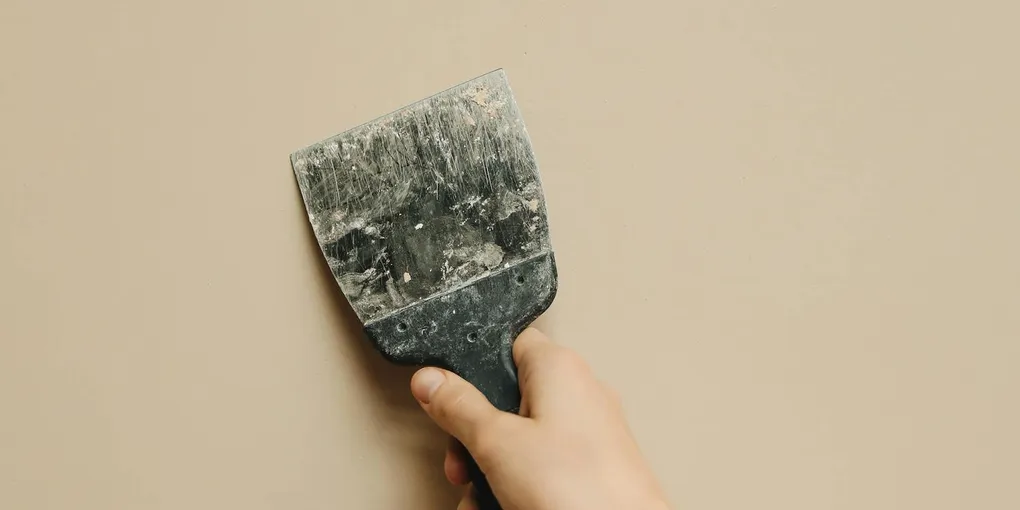
- A 4-inch plastic putty knife (NOT metal — metal gouges drywall)
- A bucket
- Old towels or rags
- TSP cleaner or a dish-soap/water mix
- Painter’s tape and plastic sheeting (to protect outlets and trim)
Resist the urge to use a metal scraper. It feels faster, it isn’t, and it will leave divots in your wall that take twice as long to fix as the wallpaper does to remove properly.
Step 1: Figure Out What Kind of Wallpaper You’re Dealing With
Before you do anything, test a corner.
- Strippable wallpaper — newer paper. Lift a corner with your fingernail. If it peels off in big sheets, you’re in luck. Pull slowly at a low angle and it may all come off dry.
- Vinyl-coated or non-strippable — won’t lift dry. This is what most older wallpaper is. Continue with the scoring and soaking method below.
- Wallpaper with a backing left behind — if the top decorative layer peels off but a paper backing remains, that’s normal. Treat the backing the same way: score, soak, scrape.
Step 2: Prep the Room
- Take everything off the walls — pictures, switch plates, vent covers.
- Lay plastic drop cloths along the base of every wall you’re working on. The runoff is real.
- Cover electrical outlets with painter’s tape and small pieces of plastic. Water + outlets = bad.
- Turn off power to outlets in the room at the breaker, just in case.
Step 3: Score the Wallpaper
The scoring tool creates hundreds of tiny perforations in the paper without damaging the drywall behind it.
- Roll the scoring tool over the wallpaper in random patterns — circles, figure eights — covering every section.
- Apply moderate pressure. You want to perforate the paper layer, not gouge the wall.
- Score one wall at a time — don’t score everything, or it’ll dry out before you can work on it.
Skip scoring on strippable wallpaper that’s peeling cleanly. You only need this for stubborn paper.
Step 4: Soak the Paper
Mix your removal solution in the sprayer:
- Easy mix: hot water + 1/4 cup fabric softener per gallon. Sounds weird, works great.
- Stronger mix: hot water + wallpaper stripper concentrate (DIF and Zinsser are common brands), follow the bottle’s ratio.
Spray a section of the wall (about 4×4 feet) heavily — like, soak it. The water seeps through your scored perforations and dissolves the wallpaper paste underneath.
Wait 15 minutes. Walk away. Make a sandwich. This is the most important part — let the water work.
Spray the section again. Wait another 5 minutes.
Step 5: Scrape
With your plastic putty knife held at a low angle (about 30 degrees from the wall), gently slide it under a corner of the wet wallpaper. If you’ve waited long enough, large strips will lift right off.
If it tears or fights you, stop and re-soak. The water hasn’t worked yet. The wall is unforgiving — once you make a gouge with a scraper, you’ve added work.
Move horizontally across the wall. Some sections will lift cleanly; others will need a third spray.
For stubborn spots, drop your putty knife angle so it’s almost parallel to the wall. You’re sliding underneath the paper, not digging into the wall.
Step 6: Remove the Paste Residue
Once the wallpaper is off, your walls are coated in old, sticky paste. You can’t paint over it — paint won’t adhere properly.
- Make a bucket of warm water with a few squirts of dish soap (or TSP cleaner for heavy residue).
- Sponge the entire wall, rinsing the sponge often.
- Wipe with a clean towel.
- Let the wall dry completely — usually 24 hours.
Run your hand over the wall when dry. If it feels tacky, scrub again. Smooth and clean = ready for primer.
Step 7: Patch and Prime
Even with perfect technique, you may have a few small spots where the drywall paper got slightly torn. Patch them with a thin coat of joint compound, let dry, sand smooth.
Before painting, apply a coat of primer designed for surfaces with paste residue — Zinsser Gardz is the standard. Regular primer won’t seal residual paste, and you’ll get bubbles in your new paint.
Common Mistakes to Avoid
Using a metal scraper. It feels faster for the first 30 seconds, then you make your first gouge. Stick with plastic.
Skipping the scoring step. Without perforations, water can’t get behind the paper. Most “stuck on” wallpaper is just under-perforated.
Not soaking long enough. 15 minutes minimum. If the paper tears, the wall hasn’t soaked enough. Spray again, wait, try again.
Skipping the residue cleanup. Painting over old paste is a guarantee of bubbling, peeling paint. Wash the wall.
Tearing off chunks of drywall paper with the wallpaper. This happens when you’re scraping too aggressively or working dry. If the surface paper of the drywall lifts with the wallpaper, you’re going too hard.
Frequently Asked Questions
Should I rent a steamer? For a single small room, no — the sprayer method is faster and less hot. For a whole house of stubborn old wallpaper, yes, a steamer is worth it ($30/day rental).
My wallpaper has multiple layers! Common in old houses. You’ll have to remove them one at a time. Sometimes the lower layers come off easier once the top is gone.
Can I just paint over wallpaper? You can, but seams will show, edges may peel, and any moisture in the room can cause the whole thing to bubble. Removing it properly is the longer-term answer.
What if the drywall paper tore? Lightly sand the torn spot smooth, apply a thin layer of joint compound, sand again. Skim-coat the larger torn areas. Then prime everything.
How long does it take to remove wallpaper from a whole room? A bedroom: 4–6 hours of working time, plus drying. A small bathroom: 2–3 hours. Plan a full weekend for a big room with stubborn paper.
Patience Wins This One
Removing wallpaper is the project that breaks the most patience. It’s slow. It’s wet. You will at some point think “I should have just painted over it.” But the right way — score, soak, wait, scrape, clean — leaves you with smooth drywall ready for whatever beautiful color you’ve been dreaming of. The shortcut leaves you with a wall full of patches and a much bigger weekend.